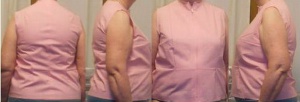
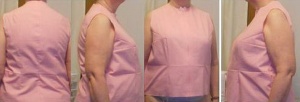
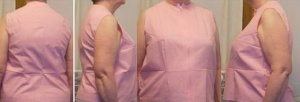
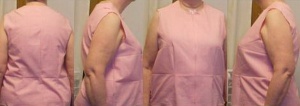
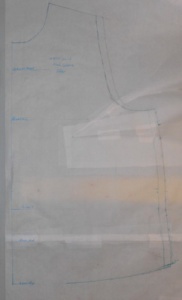
CS1201: The Knit Block

I copied the final fitting changes back to my original tracing of size 16, CS1201.  After copying the changes, I folded the bust darts and adjusted the side seam. Spent an hour adjusting the bust dart depth and lines. Then I trued the seams and had to completely revise the bust dart. What a pain. But this block is now a wealth of information. It is showing a dart every place where I needed to make depth changes.  It’s possible I could move some of the darts to seams or merge with other darts. If I had the figure of 12-year-old boy (1) I could move the darts anywhere and (2) I probably wouldn’t need most of those darts. But I have a roly poly figure otherwise known as the mature-female body and there’s no question in my mind that some darts will not be able to move or not move in their entirety while retaining the fit I desire and have worked so hard to achieve.

Finally satisfied I labeled the original tracing ‘WOVEN 20170128″ on all pieces and proceeded to develop a Knit block/sloper. First up, make a clean copy with all final notations. I have several references for converting a woven block to knit block. I’m not a fan of the ‘cut one size smaller’ theory. Neither did I care for “Thousand Teeny Changes” two of my sources recommended.  I sorted through them and realized that (1) there is no standard; no reliable set of steps that will guarantee a fitted knit sloper. Whatever I do, the next step will be “make a test garment and adjust as desired”.  Once that realization struck me, I did some fast calculations and opted to take a 1/4″ tuck at cross back and cross front; and another 1/4″ tuck from shoulder through hem.  I took a 1/4″ tuck across the cap of the sleeve and then had to redraw the cap slightly.  This will be my basis. I plan to update it with needed fitting changes. But like the original tracing of CS1201, I don’t want to lose or mess-up this clean copy and so made a 2nd working copy.  On the working copy  starting with the BACK

(Back) move neckline darts to the center back. I will plan on always using a center back seam when using this back.  Move half the shoulder dart width to the armscye; the other half to the neckline.  Move 1/2″ the back waist dart to the center dart. Redraw the center back seam to include the new curvature.  I’d like to move the other 1/2″ of the waist dart to the side seam, but I’m worried the back side seam won’t match and work well with the front side seam  because….

Front mark the armscye dart as unsewn. Retain 1-3/4″ (7/8 deep dart); rotate the rest of the bust dart to the hem. I’m hoping that will add a little tummy room.  I realize I’m creating a bit of a ‘swing’ hem. For now, I’m just accepting that. Later I will consider how and how much of the swing to remove.   My front doesn’t need a waist dart. So nothing to move to the side seam.  Which is why I hesitated to move any portion of the back waist dart to the side seam.  This will be reconsidered in future garments.

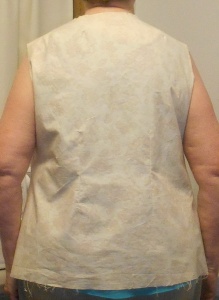
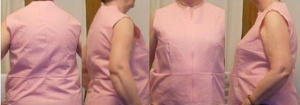
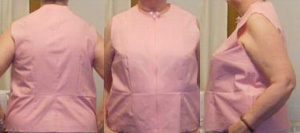
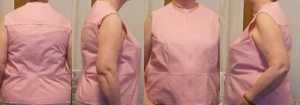
I chose a rayon knit with 30% stretch. I actually purchased a few knits recently. I realized I didn’t have knit fabrics that would make good test garments. They were either too dark or didn’t have the right stretch or I didn’t have enough yardage for a front, back, plus long sleeve.   Hope for wearable test garments (I’m tired of throwing fabric into the trash), I looked specifically for busy prints that would hide fitting issues. I gave my fabric a whiff of starch as I was pressing; laid it out and cut only the front and back.

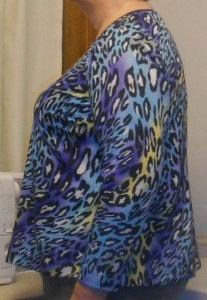
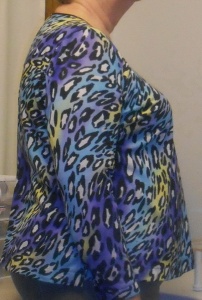
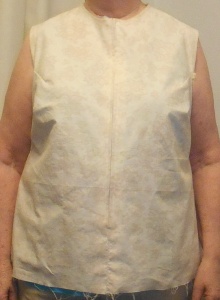
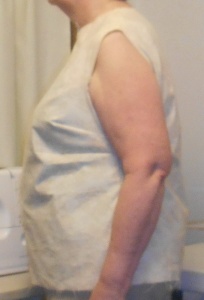
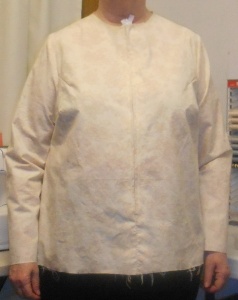
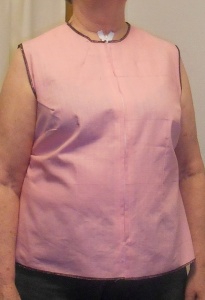
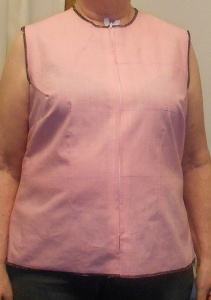
I used all-purpose thread in the bobbin and needle for stay stitching and the bust dart.  Switched to water-soluble thread for the seams.  I was really pleased with the first fitting. I think I have only 1 issue that I will correct (there’s another I’m ignoring) but I’ll write about that tomorrow.   It’s an issue that I need to think through. Considering, my actions and the results as well as possible options and then writing it all out will help me do the needed thinking…. and planning.  So with minimal fitting, I was done. The 1/4″ tucks were perfect. The sleeve cap was good.  Rotating a portion of the bust dart worked as expected.

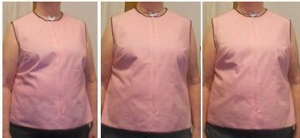
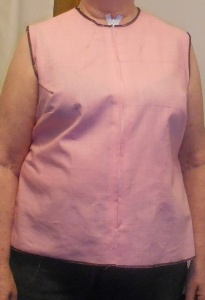
.front_resize

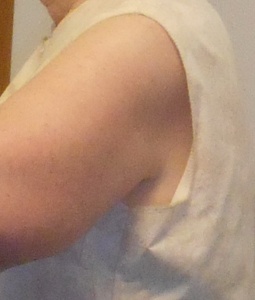
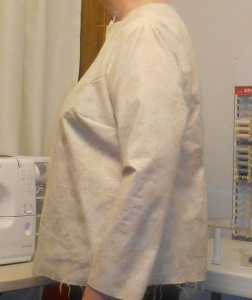
I finished the neckline with FOE; hemmed by top stitching. Another goof, I like my sleeves marked with minimum ease. I made it too little. I opted to create a vent in the cuff but my T-shirt may be a candidate for half or 3/4 sleeves later on.

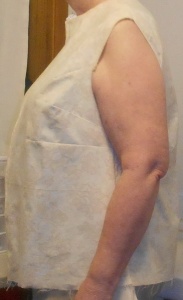
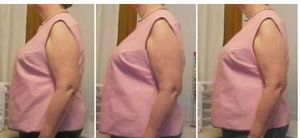
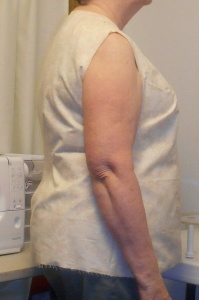
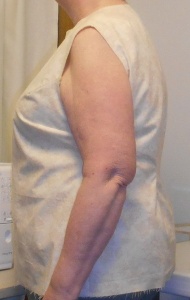
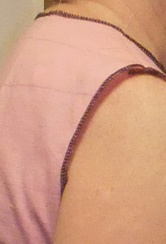
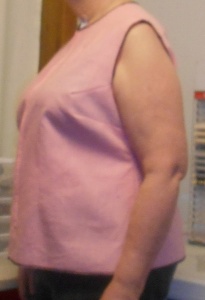
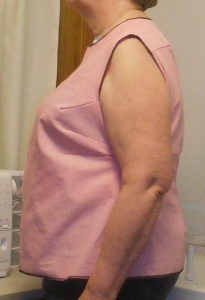
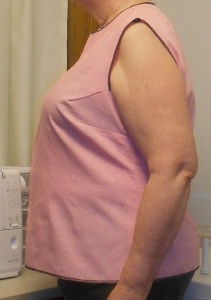
sideleft_resize sideright_resize

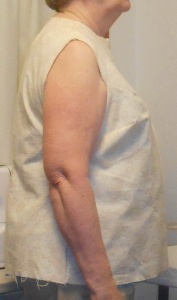
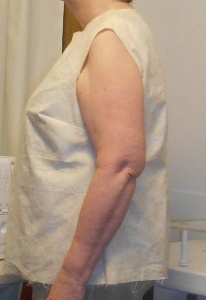
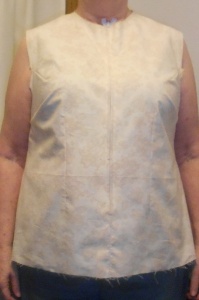
Not surprising, my left side is smoother and looks better than the right. I did work on the uneven shoulder issue, but it needs more consideration. As you can see, the drag lines from the bust are nothing like they were on the finished woven sloper. I’m not entirely sure if I removed too much ease from the front or if I need to take up more in the bust darts and then of course rotate to the hem. I did hate those big honkin’ nearly 3″ bust darts the woven sloper ended up having. Over all, to me, this looks good. Better than any RTW, I can buy.

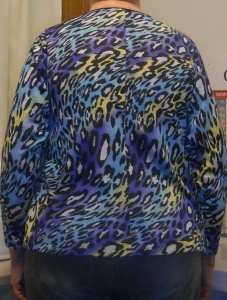
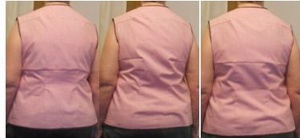
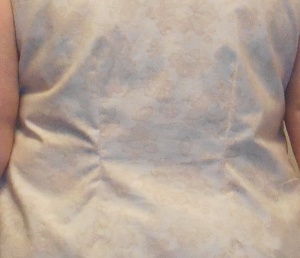
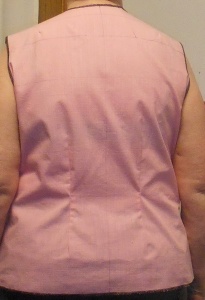
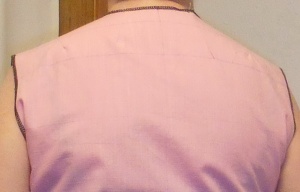
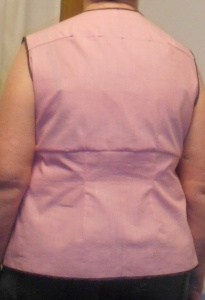
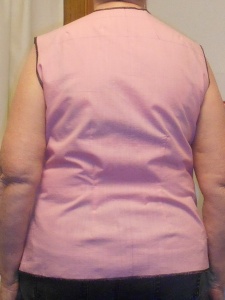
back_resize

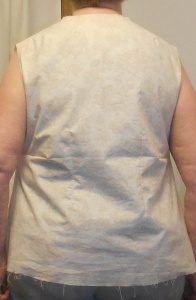
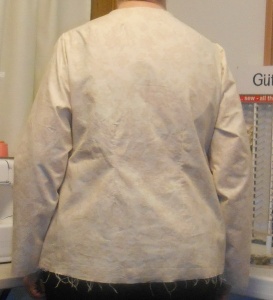
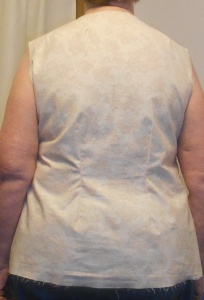
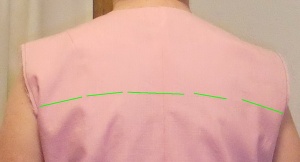
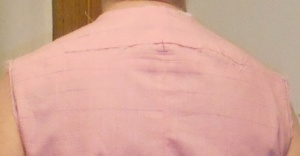
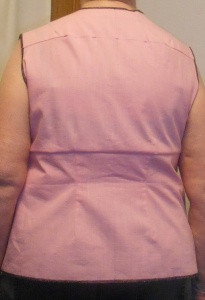
In only one fitting, I’m in the tweaking stage. I’ll talk more about the back tomorrow but today just let me say, I’m not terribly unhappy with the back but I do see that a drag line formed starting at the shoulder. This is a typical line that says “Add an RBA ” or make it bigger.

Again, things I’ll think about when I write tomorrows post.  For now, I’m just terribly, terribly pleased with myself and my new sloper.
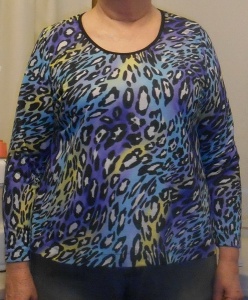
 

CS1201: Absolutely Usable!

Adding the gusset to the front between underarm and waist made a huge difference.  For the first time, I felt like I was nearing the end of this journey.
dscn7314_resize dscn7315_resize dscn7316_resize dscn7317_resize

I thought what I needed was to restore the darts that run under the bust dart, across side back across the other side and terminate beneath the other bust dart; then sleeve testing.  Can you imagine how upset I felt when adding the dart which cleans up all the little divots you see above, caused the deep diagonal at the bust to return?

dscn7320_resize dscn7324_resize

I hope it was the front dart and removed it but left the back in place. As you can see above, the back dart still affects the front pull lines. No  had to remove the entire dart, front, side, back, side front. That’s the only way to eliminate the pull lines at the side seam+bust.

I cut and added sleeves.  I wanted to know if the back was too wide.  I keep looking at it and thinking it’s just a smidge wide. But then I think, no a blouse WITH sleeves would need a little more room across the back.  My other question concerns the armscye total length.  Through pinching the shoulder, adding the front dart and pinching under the arm, I’ve removed 1-7/8 length.  My alteration instructions all say that when you tamper with the armscye, you need to restore it. I’m conflicted because this armscye sits about 1″ below my underarm.  If it were a knit, I’d want to raise it at least 1/2″.

underarm_resize

If this were to be non-stretch sleeveless, I’d want snug it up to my body which would reduce length even more.  So the point now was to find out, if the back is too tight and how the armscye felt when the sleeve is inserted.

In pics below the sleeve on my right side was inserted without any changes to the sleeve cap. That side does still suffer with the not-totally-corrected lower-shoulder. The sleeve had to be ease to fit. I didn’t do a very good job. I kind of don’t care what it looks like. Just that it’s sewn well enough to determine comfort.

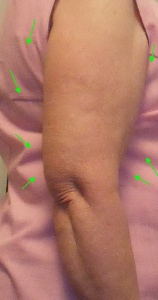
I lowered the cap 5/8″ for the sleeve inserted on the left. I left the front armscye dart unsewn but still had to be ease sleeve into armscye (and I didn’t do a real good job with the left either). I didn’t struggle with the easing and I like how the sleeve and shoulder are level as opposed to the poof of the right. That doesn’t mean I don’t occasionally like and use the poofier sleeve.

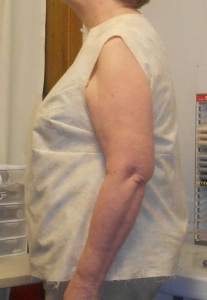
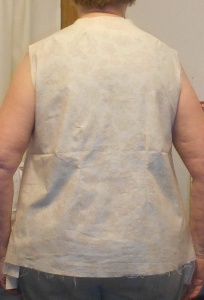
dscn7331_resize dscn7333_resize dscn7334_resize

Even though the back looks good, I’d rather have used a stretch woven. The back is just a bit tight; and here I thought it would be too wide.  Both armscyes feel good.  I also prefer the appearance of the left side sleeve but I’m keeping in mind that the right might be better if the lower, right-shoulder was fitted. The left just seems to hang better.  Sometimes I think it’s not just that my right shoulder is lower but that the arm is attached a little differently. Like a slightly different angle?   I really wanted to clean up the final drape lines on the front, but I prefer this to the drag lines radiating from the bust. Unless I get smarter in the future, I’ve decided to accept and like this near perfect fit and quit worrying about perfection.  This is close enough to be usable.

***********

Some after thoughts. I transferred the last changes back to the tissue including lowering the sleeve cap. Made a note about extra ease across the back for non-stretch wovens.  Since the only discomfort is the back when sleeves are attached, I’m not changing the armscye and sleeve cap further, though I did make a note to leave the dart unsewn for sleeves.  I may work a little more with the sleeve and armscye, if I get smarter.

This new sloper contains so many possibilities. It has places marked for shoulder, armscye, bust, back and front waist.  My current plan is to rapidly trace the sloper, rotate darts are desired, add necklines and other changes as they occur to me on the fly.  It’s also good for fitting commercial patterns. Just need to keep in mind that the remaining drag lines in the sloper are probably going to reappear in the new pattern as well.  I’m looking forward to making a knit sloper and later on sleeveless styles. For now, it’s just a relief to once again have a usable-although not perfect-sloper.

Psst — I still need to correct the lower shoulder and I can’t guarantee I won’t be back making more fitting slopers in the future. This is good, but I think I can do better.


CS1201: Day 4

A funny thing happened on the way to Day 3.  At end of Day 2, I had decided  the front and back needed to be shortened 3/4″ above the waistline and from front dart, around the side, cross the back, around the other side and up to the other front dart. Leaving the center between dart to dart unchanged. Working from copies, on the back, I made a tuck all the way across. On the front, I moved the front change into the dart; folded the dart and cut the new side seam. It’s a big dart. 2-3/4″ deep instead of the 1″ usually specified for a barely-B cup. But if my body shape requires it, OK. I’ll manage.

Thing is what worked on paper didn’t work quite the same in fabric. I spent Day 3 trying to eliminate the rest of the wrinkles, especially these:

sidewrinkles_resize.

I could make them worse:

dscn7304_resize

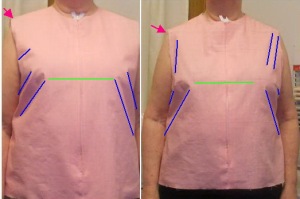
But not better. I could remove nearly all the wrinkles below the hip and above the bust.  I’ve got a little extra ease up there that I’m reluctant to remove.  I don’t want a close-fitting blouse. That means with many fabrics, I’m going to have a little ease moving around. Rippling. that kind of thing.  Point is, I could never remove the drag lines pointing to the side seam between underarm and waist.Even thought it feels perfectly comfortable, the hem is even too loose, I wondered if I needed more ease on one side or the other? Or both? First I let out the side seams between waist and underarm 1/4″.  Didn’t help. Next I opened the seam completely 1″ down from the underarm. Then 2″. 3″. and Finally 4″.  The drag lines did not improve.  I decided to look on the bright side. I had proved that circumference was not the issue.  Earlier I had added a 1/4″ dart running from bust dart, across the back to the other bust dart. About the same place as the excess of Day 2 but not as deep. That remove the last ripples on the front bust. I proceeded to let out and then take that dart in deeper and deeper. Until it was once again 3/4″ deep. While the front looked better around the bust and below the waist, those side seam drag lines were either unaffected or deeper.  Finally I ripped out the side seam. Gave front a back a light spritzing of starch and pressed carefully.  I hate to do too much of this even while fitting because the starch, heat and steam will reshape whatever I’m working on.  I carefully pressed. Up and down or slightly smoothing.  To my surprise, the front bust at the side seam looks like this:

frontside_resize

On the front, I should have little shaping. I’m definitely pear. You know, little bumps on top, little dent just above the middle, biiiiiiiiiiiiiig bump below waist? A sharp inward incline at the bust is just not right. Not for me.

To test if this was indeed the cause of my problems, I cut 2.5″ strips, slipped below each side seam and basted into place.  I pinned the sides together and drew and angled line from underarm to hem.   At this fitting, the line angles steadily thereby increasing ease all the way to the hem.

dscn7310_resize dscn7313_resize

Yep! That’s the answer.  At least, the answer for the underarm/bust drag lines.


Sheesh! One error. Two days of pain.


Day 3

I mulled over the alterations I was testing on Day 2.  For sure, I needed to fix the gaping armscyes but was the 1/4″ back dart and 3/8″ front the answer?  I also needed to position the apex correctly – a move of 3/8; and shorten the lower back 3/4″. Question for me is where best to make these changes.  If I move the apex by shortening at the cross front, will I need to release the armscye dart?  I think so but that means I don’t have the extra ease wanted when inserting a sleeve. Connie says to reposition the apex to match your own. But I think that taking out that 3/8″ was reducing the bust to side seam drapes. How will I handle those if I just mark a new apex? Below the armscye? Possible. The bust dart falls 3″ below the underarm base. A 3/4″ tuck won’t interfere but it will make the front side seam  shorter than the back and the shaping will no longer correspond. So I could move the back 3/8″ tuck all the way up and directly across from the front tuck. Or will be too high to create the effect I want. See, I think if you have the figure of a 12 years old, those darts can be moved anywhere.  But when your body is curved and, lets say substantial, will the fitting i.e darts and seam curves have to correspond with your own.  Will that tuck work just as well below the underarm as it does 3″ lower? I’ve not yet worked on the lower right shoulder. I’ve been able to alter both shoulder the same and then make a small adjustment when sitting at the sewing machine. Is that still possible?  Kind of think I need to be addressing the lower shoulder from the get go i.e. the pattern.  The right shoulder is not only lower than the left, but it is lower than it was this time last year.  AND then I’ve still not addressed the tummy. It needs not only more ease (added by adjusting the side seams) but most likely a little more length as well. Howe can I do that without adding more flare at the hem? Speaking of which when do I’ll balance the hip/hem level?  All these changes definitely have an effect on other parts of the garment. That’s the chore for today.

A few more tests were in order. I’m not entirely sure the back waist perfectly horizontal.  I do have photography shortcomings.  Does the end nearest the side seam raise/lift slightly? Or is that my photo skills become apparent. One way to tell is make the back 3/8″ tuck into a dart wide end at the side seam terminating beneath the waist dart.  I’ve already seen making a front dart (at the armscye). It had no effect upon the bust to side seam drapes. Also with the dart just above the waist, the waist does not lift further Even the side view appears level. A better choice could be  increasing the bust dart from 2″ to 2-3/8″ and moving it up to correspond with my apex.

Testing

slide4_resize

On the far left (as looking into the pic) is the final fitting on Day 2. In the middle, the 3/8″ tuck has been changed into 2 darts with wide end at the side seam and the darts are raised about 2-3″ higher than Day 2 Tuck.  I see that hem has grabbed a little high and has developed a pooch right above. More importantly the middle of the back has developed even more. In the far right pic, the darts have been corrected back to a 3/8″ deep tuck but at the higher level.  I think the tuck has to be taken further down.

slide5_resize

I put more creedence into the left side because I still haven’t made any corrections for my right shoulder.  Far left front is Day 2 fit. On both the next 2 photos I’ve smoothed the dart that was just above the waist up into the bust dart. In the far right pic, I’ve marked my apex.  Combined with photos of the left side

slide6_resize

I think increasing the dart nearly solves the drag lines beneath the bust lines.  I also give some leeway to the pics above because darts, tucks are more accurate if indicated on the tissue and transferred before all the sewing and pressing.

Labeled my tissues with a big “Day 2” , marked the following changes

  • Back neckline and shoulder darts stay the same
  • Move back armscye   just under the shoulder seam and folded  out  which will  changing the back shoulder slope but not length.
  • Redraw back shoulder dart.
  • Add 3/8 tuck across back just above waist
  • Redraw back waist darts
  • Adding 1/4″ to the back and front side seams from hem up to 1″ above the waist.
  • Add 3/8″ front armscye dart
  • Increase bust dart 3/4″

and then created a new back and front with the changes.  Over and over I’ve seen that alterations made to the muslin then transferred to the tissue don’t carry through to future garments.  Pants are the best example of this. I’ve made the fish dart everyone says is the solution. Pinched it out. Stitched in. Transferred to tissue. Cut a new test from the altered tissue. Guess what?  Big ol’ drag lines. Bold as ever. I am hoping the alteration I’ve made work well. But just in case I want to preserve the original and keep track of the changes.

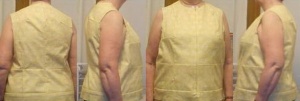
My favorite this time is a 100% cotton purchased to make a blouse. I love the print. It has an old, lace type feel due to the print. But I never made the planned blouse. I grew up in cottons. Started my working career in cottons. I just know this cotton is going to be a wrinkled mess in only a few hours. So, I’m using it as my next muslin. Unfortunately, it does have the same hand as the previous fabric. Like the other, it doesn’t stretch. But it is not crisp. It’s softer without being a drapey fabric. So hard to describe. I expect not only atrocious wrinkles after a few hours of wear, but additional drooping. In some styles this droop would be a feminine touch. As a sloper, not so desirable.

I was relieved when looking at the 2″ screen of my camera, that I didn’t see I needed to start over. (That’s what happened with the moulage.  Every new moulage was as if the previous one hadn’t existed let alone cost me hours and hours of work.)  For the first time, I made a slight adjustment for my right shoulder.  I stitched the right shoulder seam 1/8″ deeper.  I’ll share the pics from the shoulder tweak.

dscn7279_resize

Start with the front because I think it looks quite nice.  I don’t think most people would see anything wrong. The slight change to my right shoulder has made both sides of the front look equally nice.  I may increase the shoulder offset from 1/8″ to 1/4″.  Not sure just yet, because it may be better to remove all extra length from one side or the other. There is a slight hint of the lower bodice diagonals that used to be between waist dart and side seam both right and left. I’m sure these wouldn’t be visible had I still be using the more crisp fabric.  The solution previously was increasing the bust dart width, which BTW leaves the front length that I need for a level hem

levelhem

The camera always distorts straight lines that run around a globe. So I think this is level and I’m unwilling to do anything that would change it.  But back to the diagonals, my bust dart is 2-3/4″ deep.  I’m not sure I want a 3″ or larger dart. That’s a whopping amount of fabric in the side seam and very unusual for a barely B cup. Another option could be a tuck across the upper bodice but then the front length would be short and my front hem would rise like a bird.  I would need to add length somewhere.  I never trust alterations which result in other alterations. My gut feeling is “I’m fixing the wrong thing.” And I’ve seen the time when I fixed A. Which created B. Correct B. Holy cow, I now have error C. Fix C and guess what? A is back.  I don’t trust alterations that produce the need for more alterations.  I’m Ok with alterations that only partially correct. Like the 3/8″ front armscye dart fixed the armscye length for the left side and helped the right side. A 2nd alteration was needed to completely lower the right side shoulder down onto my physical shoulder.  So the 3/8″ dart didn’t fix everything but all of one side and most of the other. I trust those kinds of alterations.

Despite my comments,  I would wear this front. I might be wondering about further corrections, but I would wear it. Moral of the story:  My Front gets 2 Thumps Up!!

To the back:

dscn7276_resize

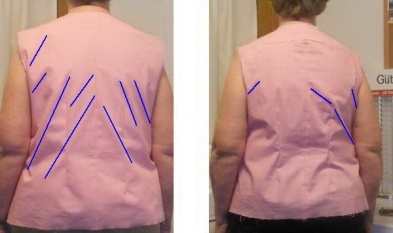
For this tissue, I moved the back armscye dart up just below the shoulder. Sliced across the back and then overlapped 1/2″. I then needed to true the shoulder, shoulder dart and the armscye. Slicing across the back and not just the 4″ of the dart was needed so the pattern would lie flat. Unfortunately, it shortened the back length about 1/8″; and so I’m seeing once again diagonals starting at the cross back, angling across the back towards the seam above the bust and maybe 1 above the bust.  Interestingly, the left shoulder is still gaping. The right shoulder with its deeper seam allowance is riding nicely where it should. Also there are fewer and less deep drag lines below the right shoulder than the left. I looked at the front and back shoulders enlarged 200%. Right and left front are just brilliant. Back shoulders are showing the anomaly and of course the wrinklers below.

My thought is I need to do the tissue alteration differently. I’m thinking either move the dart all the way up to the shoulder and slice it off. Which would entail changing the shoulder length back to 4.5″ (5″ with dart); rebalancing the dart and redrawing the armscye.  All doable. (I really did learn from the drafting class.) 2nd alternative might be rotating the dart to the shoulder dart i.e. closing the dart where it was originally taken (3″ down from the shoulder point on the back armscye),  while allowing the shoulder dart to open.  The dart would increase in size. The shoulder length stay the same.  I’d need to tweak the armscye (there’s always a smidgen of difference).   The dart would need to be redrawn and trued.  Seeing the gaping above, I should/could increase the amount of the armscye dart at the same time. Confusing? This dart

shoulderdart

That would not take care of all the wrinklers

These wrinklers

sidebackwrinklers_resize

which extend to the sides

dscn7277_resize dscn7281_resize

I decreased the back length above the waist 3/4″ (added it back at the hem to maintain overall length).  I increased the bust dart 3/4″ to remove most of the diagonals forming from apex to side seam.  While these aren’t as bad, telling me I did something right, I’m not sure if I should repeat the process i.e. reduce back length above waist/ reduce front side length by increasing bust dart.

I’ve reduced the armscye length 7/8″ over all (1.25″ on the right side). I wonder if the armscye should be restored.  Didn’t immediately do so because 1) the underarm sits 1″ below my armpit and 2)the side seam at the underarm has sufficient ease.

I’m wondering if the back is too wide.  I look and think it is; then think “no when I put the sleeve in I’ll be happy with the armscye the way it is.

Ummm. Suggestions?

CS1201: Fitting Day 2

Warning! Long Post. Many Pix!

I made few changes to the tissue. I was fairly sure I was seeing way to much ease and trimmed all the additional I’d added along the  seam allowances.  While I’m pretty sure the CB needed more length above the cross back, I’m not sure how much.  I added 1/2, could have used at least a smidge more.  Instead of cutting up my original tracing,  I traced the updated back tissue and made a 3/4″ RBA using these instructions from Fit For Art. I”m sure I’ve seen other instructions which rotate the added width at CB to the shoulder dart but this is OK. It has the advantage of  keeping the shoulders and shoulder dart as Connie drafted.

I placed the front tissue back on top of the now disassembled, starched and pressed pieces.  Trimmed the excess and all the frayed edges. Then copied the front darts and the guide lines.  I made a few extra guidelines above the center front and above the tummy.  The back,  I cut  from fresh fabric.  I opted not use a CB seam this time.  The first time I was concerned about not enough cross width. Now I don’t think that’s an issue but I did mark the center back as well as the darts and guide lines and the few extra horizontal lines above the center back.

 I serge finished the neckline, armscye and the hemlines.  I also serge finished the 1″ CF seam allowance.  I’m hoping that helps keep the area from stretching.  I need to know if I’m creating the pooching from my alterations or heavy handling.  All the darts and seams have been basted with water-soluble thread.  When I know I’ll probably be ripping seams, I prefer having WST.   Hoping I’d fixed the cross back bowing with these few changes,I did my first try on and pix.

I’m happy to report that most of the bowing has been removed with just the RBA:

crossback01_resize

This is judgement call, and mine can be questioned. I don’t have mad fitting skills.  Fitting frustrates me because I can’t read the lines. Expert advice rarely helps.   The best solutions have come from  internet ‘friends’.  So I think this is improved. But I don’t think the increase from 1/2″ to 3/4″ made a big difference. I was hoping the line would be perfectly straight.  Since it’s not and because the final fit on Day  1 included the armscye darts where todays muslin did not, the next step was working on the gaping armscyes.

I will share some Day 2 first fit pics

dscn7235_resize dscn7237_resize dscn7238_resize

Note that the back neck is not pooching at all. It’s nicely hugging my neck.  Fixed no doubt by extending the RBA across the back instead of stopping at the dart. Since this is a sloper for a garment and not a moulage, I think the cross back width is correct. There are some drag lines below the cross back. I don’t think they reach the cross back, more shoulder-blade area. The back is also lacking flare and ripples at the hem. all 3 according to Fit for Art indicators for an RBA.   I need to fix the gaping armscye but at the same time, I’m wondering if I need to remove at or above the waist, the 3/4″ length added at the cross back?

I’ve worn fronts worse than this. It’s still gaping/pooching at the zipper (CF), though not as badly as end of Day 1. When I extended the back, did that also release the front pooching?  The apex is a little lower than I prefer but I’m leaving that until later. I need to correct some front arm gaping. Once again, this is a blouse WITH sleeves sloper. They, the armscyes should not be tight. Suzy Furrer even said to leave the armscye dart unsewn on a blouse with sleeves because it would be more comfortable to wear. Besides, once the sleeve is inserted, nobody can peek inside.  Initially, I’m more concerned about the deep drag lines forming diagonally from apex almost to the side seam. I can increase the seam allowance depth. I’m not sure I want to. Once again, this is to be a blouse.  Blouses are not normally skin-tight. From years of Peggy Sagers’ lectures, I know I like 1-2″ bust ease.  Also as in Day 1, the front waist is slightly rising. Another problem to be left until the upper bodice is fit. It’s entirely possible that changing the shoulder slope and fixing those bust drag lines will improve the waist guide line position.
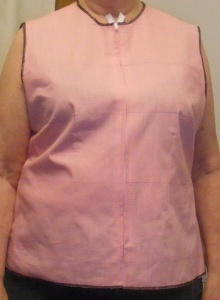
One, I think, minor notation. I stitched the back darts 1/2″ and front darts 1/8″  deep vs the 1/4 and 1/2 Connie drafted. I know from experience that my back darts need to be deeper than the front, but I also saw that during Round 1.

I knew I needed to be able to see if correcting something on the front created issues in the back or side and vice versa.The succeeding fittings were, necessarily, multiple small changes and consumed the rest of the day. (My sewing sessions are usually 3-4 hours).

Next fitting I intended to add 1/4″ darts high on the armscye that might later be smoothed up to the shoulder seam.  I didn’t want to mess with the shoulder length. It was perfect for me.  I’d also intended to increase the side seam depth 1/8″ for this fitting; but as I thought about the pix, I changed my mind. I created a 3/8″ front armscye dart but  did nothing to the back. Instead the side seams were stitched to the full depth Connie drafted, 1″.  The hem felt a little tight in back but loose in front.  Up at the tummy, the front was too tight it’s seen in the pic through the drag lines that suddenly develop for the first time below my tum tum.

dscn7241_resize dscn7242_resize

The underarm feels fine. Hugs my body without being tight and I don’t think I’m seeing any new wrinkles at the armscye. I’ve not added a back armscye/shoulder dart and the back armscye sticks up a bit as always:

backarmscye_resize

Now this is a back that looks slightly, an itty bit, too wide.

backupper_resize

Like I should use the 5/8″ SA instead of the 1/4″ for which I adapted my tissue. However I’m more concerned by the waist where another pooch has made its appearance.

dscn7239_resize

Next fitting? Let out the side seams  about an inch above the waist to the hip (which also happens to be the bottom edge/hem).  I may want to offset the front side seam at the hem — later. For now, too much ease is tolerable.  I also need to add the 1/4″ back armscye dart.

Both actions (back armscye dart and narrower side seams) improved the look and feel. Surprising  the side view was also improved but the front about the same.  Contemplating some advice received recently , I added a 3/8 tuck at the center back between the darts which then tapered to nothing at the side seam. You have to see this back NOW!

dscn7251_resize

There are some lines above that are new. I”m not sure that’s a fitting issue or a sewing issue.  I do find that these changes are best when done to the tissue. For one thing, I make the same change on both sides. Even though it’s not patently obvious, one side of that fisheye dart is higher than the other.  Pretty sure that pulled the fabrics off grain and is responsible for most of the drag lines.  The back fisheye dart even slightly improved the side but not the front

dscn7254_resizedscn7253_resize

In for a penny in for a pound, eh? I extended the fish eye dart. It starts below the bust dart increased to 3/8″ at the side seam; continues across the back at 3/8″ to the other side seam and then tapes to nothing beneath the other bust dart.

dscn7255_resize dscn7258_resize dscn7259_resize

Looks better in the mirror. For one thing, my front view is slightly turned so that the right side, the lower shoulder, is prominent.  In the side view I think the drag lines are coming from the side seam not the tummy. Think also I have the issue of the grain being off. More importantly,  I think the dart is at the wrong place on the front.  I think this really needs to be above the apex.  I  don’t like the bust guide line hovering just below my personal apex.

That concludes 3 days of working with CS1201. 1 day of prep; 2 days fitting. I don’t mind spending the time when I feel like I’m making progress.  It’s helpful that I’m working with something that feels familiar.   Right now, I need to think about the changes and results and decide what to do next.  You know, I’m really thinking of new fabric that’s not been pressed, stretched and steamed.  Yes, new fabric to go with a newly modified tissue.


CS2017: Fitting Day 1

I was overly pessimistic about the ease. Initially my sloper flared like a tent from underarm to hem. Off. Stitch side seams deeper. On. Repeat 3 times and a female shape emerged from the tent. As I worked on fitting I continued to increase the side seams 1/8″ at a time until they were 1-7/8″ deep, I could have stitched even  closer.

Connie has about a 7-step fitting procedure starting at the shoulder slope.  I started there last year (correcting my shoulder slope).  Front and back sloper were different but then the rest of my fitting issues practically disappeared on their own.  This year the first thing I noticed is that the apex was below my own almost  a half-inch. The first correction I did was remove the zipper and make a 1/4″ deep tuck  at cross front. Then the line was riding just a little high –on top of the curvature. That may be within tolerances but I prefer the balance line bisect my curvature. I left it for now but made a note to change the amount to 3/8″ when transferring to tissue.  Didn’t need to do that because….

I returned to Connie’s first step (correcting shoulder slope) by pinching the shoulder at the armscye to remove the gaping. This did not go well or quickly. I made multiple pinches checking in the mirror and sometimes stopping to take and examine pix.  In trying to correct the shoulder slope the front and back neck would start gaping. Then front shoulders slid towards the back and then towards the front. The apex that was too low?  Migrated up and down. After 2 hours, I said, “This isn’t the answer. Or at least not all of it.”  I looked carefully at the pix and realized the CB was saying “I want length.”

roundbackw_resize

I don’t see where this is discussed in Connie’s instructions.  Maybe I’m reading too quickly?? But I do recognize the phenom and was expecting to address it at some point.  Now seemed like the time. I cut the Cross Back from below shoulder dart across to the other shoulder dart and basted a strip of fabric just above the cut. I spread the cut open a  1/4″. It helped but did not remove all the bowing, so I open the cut  1/2″. Much better.  I added small darts front and back at armscye just under the shoulder. Nicer still.

crossback2_resize

Except both back and front had developed these, pooches:


back11_exposurefrontpouch_exposure

I  liked the back, even with its new pooch

lines
Before RBA —————————After RBA

There are considerably fewer drag lines coming off the cross back. However, other than the apex moving to the correct position (as a result of back changes not the front tuck), the front remains about the same.

frontlines


I think the back should have been split all the way to the seam allowance instead of just under the darts.  I’m not sure that would have helped the front. By this point I’d ripped and stitched the zipper  yet a 3rd time.  In addition to that stress,  I had taped the neckline and armscye rather than basting. The adhesive was not strong enough and the tapes came loose in several spots.   Not knowing exactly what went wrong, I opted to open all the seams, spritz with a little starch and start again on on Day 2

I still need a fitted block.

I use my fitted blocks all the time. Yes blocks. I want my blocks to contain my minimum wearing-ease and some neck/hemline notations. For quick access I like blocks for woven fabrics, knit fabrics, sleeved and sleeveless garments. While I don’t like drafting (too detailed and picky for me), I do like pattern making if I can I start with my block. Sometimes I’ll make a block for a particular style (like princess) which I use over and over.  Eventually I’ll have morphed my blocks into become favorite patterns like shirt with all the details from Loes Hines’ Tunic Blouse but perfect fitted and suited for me. I especially like is the ability to quickly check a new pattern for fit and make adjustments or discard immediately. (There have been patterns I could just tell by comparing with my block that they wouldn’t work.)  I don’t just want a block, I need my block.

I decided to work again with Connie Crawford’s set of slopers, CS1201.  (Don’t know why, but I can’t make a link to the pix on Connie’s site.)  As I recall, CS1201 was amazingly easy to fit last year — before my body made yet another change. Connie says she has measured thousands of plus-sized ladies over the years. She created her own pattern line based on the consistent variations she found on plus sized women. I don’t know what all the variations all but she gets heaps of praise from women who’d given up on sewing or even having nice fitting clothing. I hasten to add, that not everyone loves Connie. That’s to be expected. As it should be expected that my body may not need all the built-in variations or may need even more. I remember fondly the ease of fitting the sloper and the frustration of fitting most of her patterns.  I understand the criticism because I myself do not love all things Connie.  But I liked CS1201 enough to give it another shot.

Using the measurements I’ve taken, checked and rechecked again and again, I selected size 16 to trace. Once traced, I couldn’t stop myself from checking measurements of the pattern and comparing to my own measured and preferences. The front shoulder measured 4-5/8″; back 5. Front does not have a dart, back does. Net shoulder measurements are 4-5/8″ front; 4-1/2″ back. I need 4-1/2″. Connie Crawford’s patterns are practically the only patterns I’ve ever had where the shoulder is the right width to begin with! OK the front was 1/8″ too much. After a little thought, (Was this intentional? i.e. Was Connie adding a bit more ease for the busty? Did I err during tracing? Was my pen nib too fat? etc), I rotated the 1/8″ excess from the shoulder through the waist dart-said dart is expected by me not to be sewn. Connie even says there are some figures that don’t need the front waist dart. The neck width was wider and deeper than the moulage by close to the amounts that Suzy Furrer specified when converting the moulage to a sloper. The differences (about 1/8 and 1/16) were small enough that I ignore them. While I noted with pleasure the back neck was already slid over 1/4″.  That’s what Suzy recommends and I need for controlling front neck gaping.  As expected, cross front and cross back were about 1/4″ wider. At this point I hadn’t marked in the seam allowances and was measuring and subtracting. I acknowledge I could have small errors. I like and strive for semi-fitted to loose garments. I don’t like sewing and fussing with close-fitting garments.  If 1/16 is going to ruin that fit, I don’t want wear the that garment. Certainly don’t want to spend time sewing it.
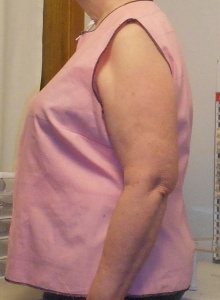
But I digressed. Hmm, differences in the pattern’s measurements with my measurements.  I wasn’t sure there was enough ease  bust, waist and hip and questioned if these guide lines were at the right levels. Additionally, I experienced some reticence because without including the CF 1″ SA, the front was wider than the back.  I’m forever adding 1/2-1″ extra ease on commercial patterns to the back pattern piece.  I’ve sometimes wondered if I was in the group Sandra Betzina mentions that needs a different size front and back.  I was bothered enough to add 1/2″ along the front side seam and 1″ along the back side seam.  I also added a 1/2″ CB seam. I’m still contemplating the round curvature I see in the side views of me.  A CB seam offers the opportunity to add a little width if needed.

I traced the short sleeve pattern (that’s all I can find in the package) at the same times as the front and back. Now I made no measures or adjustments to it. Until I know what the front and back need, I have no idea what to do to the sleeve. However, I’d prefer not to sort through the original pattern pieces yet again. There are quite a few. So traced before and set aside now. Then I trimmed the excess tissue and laid my tissues aside.

I’m using the same fabric as for Moulage 4. It’s a cotton/poly blend. Mostly cotton. I can smell the aroma of cotton when I press with a hot iron and steam. With a whiff of starch and high heat, it pressed crisply. I laid out the fabric. Laid the pattern on top. Turned out the lights and went upstairs for dinner.

This has become a habit of mine i.e. tracing the pattern, making adjustments, selecting fabric and laying it all out ready for the next sewing session.  I’ve found that the break at this point gives me a chance for second thoughts before irrevocably cutting fabric. It’s that measure-twice-cut-once philosophy, slightly modified.  It’s saved me grief several times. Yes, many times I’ve made only small changes and could have cut the day . Point is, I often make changes before cutting the fabric because my left brain had time to think and feel more confident in my sewing/fitting for allowing that thinking time.

Moulage Fini

Seven (7) fittings later, I’m finished.  I’m not counting the fitting sessions of the 3 previous moulages.

.slide1_resize

Fit01 (above) was really a net of the changes to Moulage1 through 3.  I remeasured both circumferences and levels which confirmed the changes/alterations made to Moulage 3. The single significant change is that I opted to use the tummy measurement instead of the waist measurement when drafting the moulage.  That decision was a result of measuring the levels and realizing that my tummy was 1″ lower than my waist.  Most people will find 1″ down isn’t significantly different. For me, it was 3″ more circumference. I’m rather like the women with heart shaped bottom halves except my width is in front instead of at the top of the hip bones. I repeat, all the other differences were derived from the alterations which produced a relatively nice but not perfect moulage. I thought I needed only transfer alterations and perhaps a final tweak. All the hard work had been done.  I mean 3 moulages with 12 fittings, should I not be expecting near perfect from Moulage 4?

Fit 2:

slide2_resize

But no, there I was slogging away alteration after alteration. Checking and rechecking my measure and calculations. Adding a yoke to the shoulder; pinching away fabric; letting out seams; or taking them in; on and on

Fit 3:

.slide3_resize

Until to my horror, I realized my alterations were creating the same issues that drove me to attempt drafting.

Fit 4:
.slide4_resize

I remember reading about drafting patterns several times. After endless plot such and such point at distance from distance/plot or up distances blah blah blah; the finish was always add seam allowances and  make a test garment aka muslin.  I mean even the pattern drafting instructions say after you draw it all out, then figure out the fit.

Fit 5:
.slide5_resize

This experience, painful though it was, has convinced me that my original impression was correct: Drafting is not a fitting tool –at least for my body– it’s a starting point. It something to have in your hand besides flat tissue or fabric.

Fit 6:
.slide6_resize

I can’t seriously  complain about Suzy’s class. Nor the book. Pattern drafting is comprised of a lot of information. I found that the book with instructions in a list to be a great assist to the class but not a replacement. No foolin’, having Suzy explain and demonstrate saved me several times.  I would have preferred drafting the back first. In the book, Suzy explains that the industry always drafts the front first. It’s a textbook. It’s an intro into a world for the would be designer, pattern maker, or other fashion industry individual. It makes sense that she wants to teach good habits up front. For the fashion industry, drafting the front first is the standard. While I’d prefer otherwise, I have to concur that she made the best decision i.e. teach these guys they way they will be expected to work. Give them the tools and habits they need to work.

The I give up, Fit 7

slide7_resize

I stumbled on  standard levels.  Apparently from waist to shoulder, I’m pretty standard. Not below. That caused most of my issues with the first moulage.  When I drafted Moulage 4, I found that starting with personal levels (7″ instead of 9) made a difference in where the armscye settled and from there how the armscye is drawn and connected to the shoulder.

After all the time, effort, materials $$$, I expected a workable shell. I got nothing. I’m not using the one above (Moulage 4); and the one below

.slide8_resize

Moulage 3 won’t work either. Why? Because Moulage 4 is the physical ‘net’ of all the changes made to Moulages 1-3. The alterations combined of Moulage 1-3 put into a new moulage produced a horrible shell.  If I open up the seams of Moulage 3, measure and copy back to tissue, I’ll have the tissue for Moulage 4.  What’s the point in that? I already have a tissue of Moulage 4.

But, I must admit I understand patterns better. I understand where these measures come from and why certain lines look like they do and are placed where they are.  In the future, I may find the information helpful when making fitting decisions even if it has not been helpful in achieving a fitting shell.  My biggest regret is investing so much time. It’s not enough to measure and plot points. At some time, the knowledge of the body and its issues has to supersede mathematical calculations and precise drawn lines. I should have quit with Moulage 3.


Moulage 4: Prep

Surprised and delighted, I received my book a few days earlier than expected. Primarily to check the high hip and low hip levels, I took measurements a 2nd time.  This time I took the circumference measurements at my levels not the standards.  I also measured the distance between levels. My high hip is about 3″ down from my waist and the low hip another 3″ below that. So 3 and 6 rather than 4.5 and 8.5.  The second thing I was looking for was the progression of circumferences. It seemed like my tummy rounded out immediately under my waist rather than smoothly increased in size between waist and hip. I confirmed this (and the hip levels) by measuring at 1″ intervals below my waist.  Surprise to me, I’m 3″ larger  1″ below the waist.  I really do round out immediately! There were minor differences in several other measures.  I decided to keep the upper body measurements as is, because that part of the moulage is looking really good.  From waist below, I adopted the new levels  and measurements. At the waist, I opted to use the larger tummy measurement and work on closer fitting with darting at the first fitting.

I photocopied several of the pages which pertained to moulage. I’m nervously confessing to this because I could be violating some copyright or another.  My purpose however, is not to share but to have a place on which to scribble.  I took my copies to my easy chair and worked through the calculations.  There is something to be said about making these without one eye and part of the brain still trying to watch the video which discusses the very calculations I’m trying to compute. I worked in pencil so I could erase as needed (and it was).  Once calculations were made and checked, I took all back to my cutting table in the Stash Room.

Id like to say it was easier and faster to map out the moulage this time.  It was. took me 2 hrs 20 minutes as opposed to about 6 hours the first time.   Part of that is of course the previous practice and gained understanding. But partly it’s because I had all the information right there. At my fingertips.  I was not watching a video or making calculations. The photocopies pages were a stroke of genius.  Several times I said to myself “Wait. When did I plot G or K or k.” The instructions in the book are pretty much in alphabetical order and it was easy to check back and see where I had missed a point. Even at that, about a third of the way through I started crossing through the line as the point was plotted so that I did not accidentally skip points.  On the back, I opted to slide the shoulder over 1/4″ now instead of waiting for the first fitting.  I knew from Moulage 1 that the front would gap.  The solution is shifting/sliding the back shoulder over 1/4″. The wider back neckline will pull on the front and remove the gaping.  I had another objective in mind as well.  I knew that my back waist length combined with my shoulder length and armscye measurements would make it difficult for me to create a nice smooth armscye curve.  Previously I’d increased the shoulder dart to 1″.  That extended the shoulder line enough to draw a nice curve on paper but it made for a deep dart. By sliding the shoulder, I needed only add 1/4″ length to join up with a nice armscye curve.  As a result, my shoulder dart need be only 3/4″.  Somehow a 3/8″ dart is not nearly as awkward as a 1/2″ deep dart. For Moulage 4 I erased fewer times, but I did have occasion to erase. My finished moulage was much cleaner than the first moulage.

Visually, I compared Moulage 1 with Moulage 4.  Overall I could see the waist was a little differently shaped; the side seam came up higher as well as the armscye. That did make it easier to draw the armscye.  However,  I once again could not connect the back armscye points without extending the shoulder line the extra 1/4″. As noted in the previous paragraph, this gives me a nice armscye curve but requires a deeper dart when stitching.

As nice as the drafted moulage looked, I traced with a Sharpie creating a Clean Copy  First o work with. Also,  I want to be able to go back to the original draft if I need to make corrections. I hung the draft up and started working with the clean copy.  I made a few changes.  The back and front shoulder slopes were different. As Suzy pointed out, these really need to be alike, for most people. The shoulders have to sewn together. Fabric will ease, but unless you specifically need/want a deviation, the shoulders need to be balanced.  I removed 1/2″ height from the front and added it to the back. This then requires that the shoulder slopes be redrawn; lengths verified and darts centered. Which brings me to this tool:

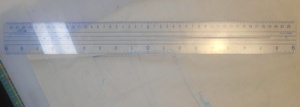
dscn7168_resize

It’s used for centering.  I purchased it several years ago and use it occasionally. Enough to keep it around. With moulage, I gave it a real work out. 0 (zero) is located in the center of the ruler. Measures extend from the center (0) to the ends on both sides of zero. It has both metric and inches.  I used the metric side because that was side which evenly and easily divided 5-1/8″ into 2 pieces. I turned it around and marked the 3/8″ darts on either side of zero.

dscn7167_resize
Shoulder correction made in red ink.

I made an additional change on the front. I did the shoulder slope then opted to redraw the side seam as if a waist dart would not be used.

dscn7170_resize

When redrawing the front side seam, it assumes a more typical shape i.e. wide at bust, dipped in at waist and wider again at hip. However I think that the drafted waist with the wonky side seam is more me shaped.


Knit Sloper

Lesson 11 Sloper Design Options

Somethings I do for fun. Just to see. Creating the Knit Sloper is something I’m dead serious about. I did not expect this to be ‘the one’.  I’m seriously concerned about the incorrect personal levels and circumferences. Until I correct those in Muslin 4 I can’t make the real sloper. I can however familiarize myself with the process and maybe go into making the final sloper with a bit of confidence.
Before we get to the knit sloper, Suzy talks about simple options for changing the sloper and a few guidelines of which to be aware. I took note of only a few

  • If you extend the shoulder, extend the cross front/back half the amount before redrawing the armscye.
  • Easy way to add jacket and coat ease: cut open the sloper along the princess line and separate 1/4, 3/4 or 1/2″
  • The Waist Shaping if needed for fitted garments otherwise there will be a wrinkle around the waist. On loose garments just ignore.
  • Sloper storage
    • Convert your slopers to tag or other durable media.
    • Then punch a hole (industry uses a Pattern/Rabbit punch) and hang with Pattern Hooks.

For me, the most important part of Lesson 11 was converting the Close Fitting Woven Sloper into a Knit Sloper.  Taking copious notes, I watched the lesson first. I started creating the sloper; stopped and ran the video as I was making the specified changes.  I’m totally unhappy with the resulting sloper:
dscn7165_resize dscn7166_resize

I used a green permanent marker to draw the final lines. You can still see some of the pencil lines. Over all the knit sloper should be about 1″ shorter and have negative ease. Exactly how much negative ease Suzy didn’t specify.  I think its a combination of your desired fit and the amount the fabric stretches.  I promise, I carefully watched took notes and then watched again as I made the changes. I’ve gotten a routine down where I can stop the video immediately. Unfortunately on my IPAD the 30sec replay is missing and rewinding is guess-work with lots of rewatching.

The side seams horrified me.  I know part of this is my shape. I have very little waist indention in the front, while the back needs a deeper dart.  I often make 2 darts on the back and 3 sometimes on pants. Nonetheless, the deeply indented waist on the back compared with hardly a hint of front waist stunned me.  I thought it wouldn’t walk (front and back side seam would be the same length).  It did, by swinging the paper back and forth sharply.  Being intended for knits, I suppose it will stitch together somewhat easier than walk. Still I doubt that it will hang smoothly from the waist down.

The armscyes are another horror.  This sloper is for knit garments. The armscye will be big enough to fit around my belly.  Obviously, I’ve misunderstood the directions. Twice. Which fills me with horror.  I used to pride myself on the ability to read and follow directions.  Apparently I don’t do well at all at watching videos and following directions.
Even as I was following the instructions, I was uncomfortable with the negative ease being developed. I want a knit outer garment to smoothly flow over my curves in a  very similar way to my woven garment. I’m not interested in revealing all my bits and bots. The only negative-ease garments in my wardrobe are tights and other underwear.

Unless I learn something new from the book, it’s doubtful that I will develop my personal knit sloper from Suzy’s directions.  I like far better  Gayle’s suggestion to develop the knit sloper from the moulage. Makes more sense then upsizing to a woven sloper and downsizing to the knit.

************My notes:

Watch the video lesson first. Don’t take my notes below and run with them. You will have missed important choices. Besides, based on the results above, I’m not sure I understood what I should have done.

DRAFTING A KNIT SLOPER

Nearly the same steps are done front and back.  Instead of listing them twice, I’m annotating “Front” which means do this to front only.

  • Trace the woven sloper
  • Remove Waist Shaping
    • Neck down 1/2″ at CB/CF
    • High Neck point down 1/2″
    • End of shoulder down 1/4″
    • Redraw neck and shoulder
  • Move Shoulder Dart to armscye
  • FRONT:  REMOVE ARMSCYE DART
    • cut
      • 1 leg of armscye dart
      • 1 leg of bust dart
    • Slide armhole dart close
    • Fill in empty bust dart.
  • FRONT: REMOVE BUST DART
    • Measure new bust dart width
    • Mark the same distance up from low hip at side seam as the new bust dart width
    • Redraw Low hip starting from Mid want on the Low Hip to the Mark just made.
    • Low hip is no longer a straight line

Continuing with Back and front directions

  • Move waist dart to side seam
  • Develop negative ease at armscye
    • Starting at shoulder
    • Mark 1/2″ along armscye but leave the original under arm
      • 1/2″ good for jersey/double knits 3/4″ better for slinky
    • Redraw armscye (22:37 in video) meeting original underarm
  • Starting at original underarm, come in 1/2″ all along the modified side seam
    • modified though moving waist dart and armscye/bust dart on front
  • Raise the High Hip 1/2″
    • Fold out 1/2″ between waist and High Hip
    • Smooth that curve

Back is done. Cut it out.

Front

  • Align back on front at underarm and new hem.
  • Trace the side seam
  • Mark the new waist notch to correspond with the back waist notch
  • True back and front shoulders, armscye and neck connections

FINISHING

  • Trace front and back to tag
  • Add numbers, any remarks
  • Label with date and “KNIT”
  • Also helps to trace the Knit sloper onto different color paper.